Showing posts with label Small Projects. Show all posts

Thursday, November 3, 2016

First Love

One of my earliest memories is learning to embroider. That little hoop immediately felt at home in my hand. French knots, stem stitch and lazy daisies seemed like little acts of magic. I might have been the only kindergartner with a thread stash. (That's my name tag for the embroidery guild above.)

Since then I've spent a life time exploring other fiber techniques, anything involving a needle and thread. But embroidery has always called to me.
It's been rather a joy to have time to revisit my first love. Designing and stitching this little pillow had me giggling for days. (Easily amused, but then never lacking for entertainment.) For so many years I've been all about machine work (not that there's anything wrong with that!) Hand embroidery seem like a distraction.

The local embroidery guild has been a wonderful discovery. We're working on a crazy quilt as our fundraiser for next year.

My style tends to be more clean, less fussy than the exuberant excess of traditional crazy quilt design, so it's been a challenge for me to up my game. This block is my first, made as part of a workshop for the quilt guild back in March. I can see now, looking at it here, that it's not quite as done as I thought. That "B" looks awfully lonely over there, perhaps I could add some beads in the background.


This is my block for the embroidery guild raffle quilt. I'm just getting started, but loving the process. I do love swirly, curly things. There will be a button bouquet in the center. I like the green rick rack, but the black embroidery has to go, not enough contrast with the busy fabric in the lower right corner.

Turns out embroidery is playing a role in the new applique book I'm considering. The Wash Away Applique sheets threw open the doors to all sorts of easy, elegant, effusive embellishment. (How's that for a book subtitle?) But there are decisions to be made before I can really go forward. More on that in the next post. Meanwhile, I'm off to stitch with the crazy quilters.


Sunday, February 14, 2016

Testing, testing, 1-2-3

When I first learned to applique (way back in the dark ages), there was a lot about the process I didn't like. There seemed to be a lot of extra steps, making extra work without extra value. I think in another life time I might have been an efficiency engineer. I love the idea of doing my best work with the least amount of effort. Streamlining the process is what has lead me to the technique I call "Hand Applique by Machine" (or, as Craftsy prefers "Machine Finished Hand Applique").

Instead of sewing everything twice (basting), I glue baste, for example. And to avoid the step of removing the freezer paper, I developed Wash Away Applique Sheets.

Another tedious, but vital, step in the process is cutting out the templates. I tried to make it quicker by stapling and cutting multiple layers of templates, and that works just fine. But what if we could just send a little file to a machine and hey, presto! perfect templates? It's just as easy as sending a document to the printer, but this machine spits out applique!
I've considered all sorts of die cutting options. The problem with die cutting machines is that the sizes are set, a die for a rose will only ever make a rose that size. But a file for an electronic cutter can be scaled to any size! Look at all those perfect templates, cut from my WAAS.
I've been playing with my Silhouette Cameo. I'm learning how to use the design tools, which are really pretty simple.

I love that I can make perforated lines for the internal shapes, which will make it very easy to keep the parts of a motif together. There is also a process for writing on the shapes, which will help in organizing the shapes for a large project. I'll be playing with that next.
I'm not completely happy with this project yet. I really don't like my fabric choices, so I'll be reworking it and making it again. But I am thrilled with the possibilities of easily cutting my applique templates, just look at those perfect circles, imagine being able to make them in any size! I wonder, though, is this a gadget that applique quilters could love? Would you be tempted by a pattern that included a file for an electronic die cutter?

Wednesday, February 10, 2016

A silk painted rose

This little rose was my first attempt at painting on silk. I was hooked from the start. I have signed up for two more classes and set up a nice little space in the basement for the delightfully messy stuff. On this piece, I've used clear gutta to define the shapes. Gutta is a resist to contain the flow of the paint to specific areas, acting like a sort of dam to hold back the paint.

After the gutta was washed out I found that I lost some of the paint with it, especially in the center. I also ended up with white silk showing where the stems were meant to go, which I liked because it just begs for embellishment.
Silk is very slippery and thin, so I ironed a hunk of Wash Away Applique Sheet to the wrong side as a stabilizer, and hauled out my box of silk embroidery floss. My first thought was to replace the missing paint in the center with embroidery stitches.
Nope. The blending of shades of pink didn't work as hoped. The stitching just looked clunky and forced, so it got picked away. The nice thing about silk is that it's pretty tough and the holes just closed right in.
What it needed was a more refined hand. I started in the center of the rose, outlining each petal, using the stitches to replace the lines that the gutta had left. As I worked, though, I felt that perhaps, once again, I was being to literal. As I got to the buds I decided to let the lines be a little more abstract, unfinished, more sketched in than actual outlines.
By the time I got to the last leaves I realized that thinner lines would be even better, so I used just two strands of the six stranded floss here. If I were starting over, I think I'd go even finer, something to try next time.
Here it is. I love how the leaves look. Best of all, this little slip of a project (it's just about 4 by 6 inches) has left me thinking about how I would do the next one differently. I won't try to fix this any further, I think I've learned all it has to tell me.

What a luxury for me, creating these little cast-offs, just little bits of this or that I can use for trying out new ideas. It seems like forever since I've had the time to "waste" on things that may not turn out. Deadlines can do that to you. It's taken me a long time to unwind from the deadline rat race too, to leave behind that feeling that every moment must be productive or I will fail, disappoint or come up short. A feeling that's left me entirely unproductive, paralyzed, feeling guilty and a little lost. Finally I am looking forward to not getting it right the first time. I have entered the joyful land of the do-over.

Wednesday, December 23, 2015

The Last Minute

Or, as the car manufacturers call it: just in time delivery. I maintain if it weren't for the last minute, nothing would ever get done, and that it doesn't really matter how long before the deadline it is accomplished, as long as it's before.

So, as my children pile into their cars to head north to soggy Green Bay, I decided we needed little Christmas Stockings for the lot of them. Stockings have been a fun part of our holiday tradition. I loved finding silly little things to include. Every year the kids each got a flash light, that was standard, and an orange in the toe. (Kids these days have no idea how precious an orange in December once was, but they're getting one any way.) One year I found little guns that shot discs, they were so cool! I'll never forget seeing the air filled with colorful little circles, and how the kids just howled with glee over them. The discs were all lost within days, I half expected to find one when we moved out.

We always hung the stockings on the kids' bedposts. It was our scathingly brilliant method of keeping the kids from pestering us before 5 am. (Works with Easter baskets, too.) It was so sweet to wake up to whispering, giggling boys who thought they were pulling something over on us.

These are little stockings, just big enough to hold a clementine in the toe, and we'll include a small can of silly string and other silly things, and some candy of course. They are ridiculously easy to make, and would be a fun way to give a little something to the nice folks in your life. The stocking is just eight inches tall and about four inches wide at the top.

I used flannel, which I washed in hot water and dried on hot to shrink for fluffy goodness. I used a 1/4" seam allowance to sew the stocking shapes right sides together. The dual feed function made it easy to sew the bulky fabric without shifting. A walking foot would be great for this. To make your own stocking with these instructions, cut the cuff so that it is 1/2" less wide than the raw measurement of the top of the stocking, and twice as tall as desired plus 1/2".

To make it easier to turn, I used a back stitch at the beginning and end of the seams. My B820 has a stitch with a built in securing function. It's handy because I never remember at the beginning of the seam, and this stitch will remember for me. (How many other fancy functions do our machines have that we forget about?)

The short end of the white flannel rectangles are sewn together. I pressed the cuff seams open, and since the iron was hot, I pressed the first and last couple inches of the stocking seams too. It will make it easier to sew the cuff in place, and clipped the seam allowance at the curve. The stocking isn't turned yet.


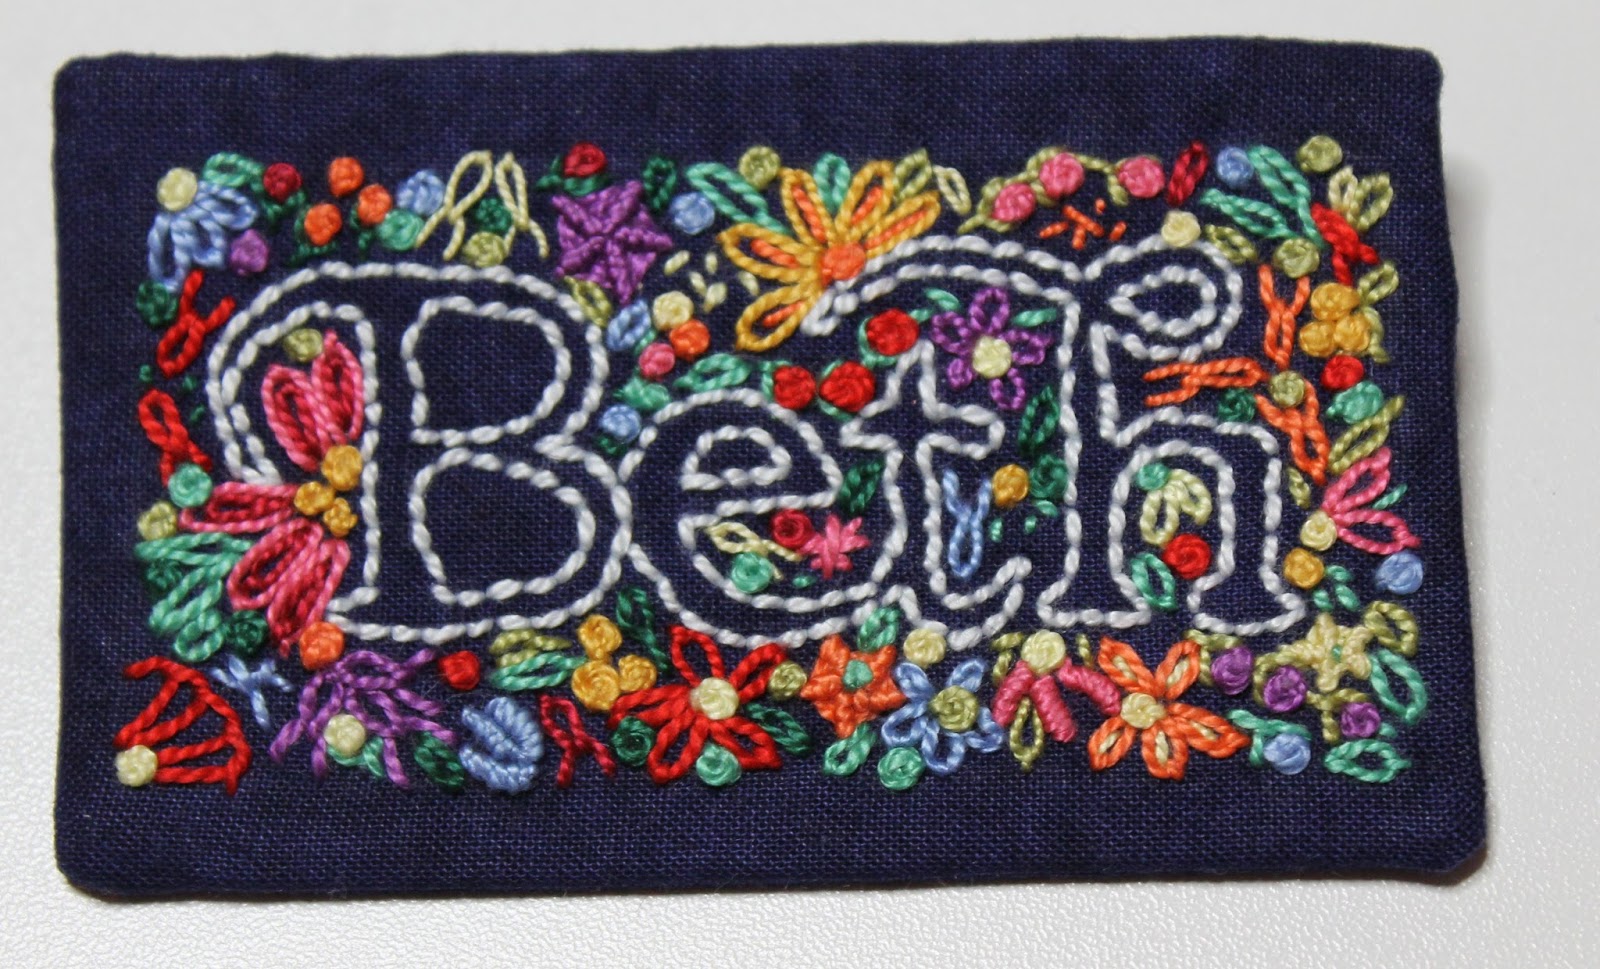
*For those who have more than a last minute, you may want to embroider the recipient's name on the cuff, you'd want to do that before sewing it. I'm just going to write their names on with a fabric ink pen.

Now, here's where it gets a little crazy, but it's super easy. The cuff is folded in half, wrong sides together, matching raw edges and the seam.


Slip the cuff over the stocking. Match the cuff seam to the back seam of the stocking. It looks like the stocking is a little bigger than the cuff, but it's not.


A couple of pins, one at the seam and one opposite will help keep everything in place. Make sure all three layers of fabric are aligned.


Here's the magic. This is a tiny opening, it's even too small it fit over the machine's free arm. So, we're going to sew it from the inside.

 Let the bulk of the stocking sit above the foot and just rotate the seam into the foot. (The first time I saw this done my poor little head almost burst. Of course it's easier! This is why we take classes.) I don't back stitch to start.

But I do finish with back stitching over the beginning of the seam.

Turn the stocking right sides out and then gently fold the cuff down over the top. The cuff seam is hidden in the fold. I'll be sewing on little yarn loops for hanging, but they could have been included in the cuff seam.


Who doesn't want an excuse to do a little sewing right before Christmas? Next I think I might whip up a couple of valances for the guest bedroom. Just kidding. Maybe.


Wednesday, July 16, 2014

How it begins


I've been invited to teach a three day applique class next March. Three days! I'm so used to trying to cram everything I know into just six hours that three days seems like an incredible luxury. I'm excited to be able to devote time to design, color theory and embellishment as well as technique. With this in mind, I've set out to develop the class sample.

My idea is to offer students a variety of flowers (you were expecting something else?), in several shapes and sizes, and allow them to arrange their own bouquets. The challenge is to present enough choices to keep everyone happy, but, at the same time, I don't want to offer so many choices that students can't make good progress on their samples.


Here's my preliminary layout, with some of my fabric choices surrounding it. I've gathered up three different styles of main character flowers, there will be three of each in the handouts. I've used one of each here as a sort of tease, but also because it is this sort of mish mash bouquets I have been cutting from my garden.


So far, so good, right? The vase isn't showing up well here, it is actually a little more complex that what can be seen. As I'm working on the glue basting I'm also considering what sort of embellishments I will add to the shapes. I may do a little ink work on the yellow rose, but I think the zinnia and the painted daisy will need some french knots, at the very least.


Moving on the accent flowers, it's there that I hit a snag. That's my little finger in the picture. That circle is less than a quarter of an inch in diameter. I want to challenge my students, not frustrate and discourage them. Glue basting shapes this small takes skill and patience. Most of my students would probably be able to pull it off by the end of the second day, but I'm thinking that I want to keep this class fun and gratifying. So, I'm back to the drawing board to simplify and enlarge some of the smaller elements. I think I'll leave some smallish ones in place, for those who really want a challenge.

I'd love your feedback! What would you like to learn in a three day applique class? Would shapes this small scare you off, or reel you in? Would you rather work from a proscribed pattern, or would the idea of designing your own bouquet excite you?

Wednesday, April 2, 2014

While I've been away...

Lots of little things have happened in the last couple of weeks. Nothing exciting really, just day to day sort of stuff. Anyone who's read this blog for any length of time knows that I struggle with the idea that what I do might be interesting to anyone else. But, there are lots of blogs out there that I love to read, so, here goes.

The deadline for the Pilgrim/Roy Invitational Challenge is fast approaching. My goal is to ship it out by Friday, but we'll see how it goes. It's been my main focus for the last few weeks.

Quilters often think, when they see an applique intense quilt such as this, that it's hard to do. While the piecing gave me bits of fits (can you say inset seams?), the applique is just simple shapes. The motifs are not difficult to do, but they do take time.


I struggled a bit, with the fabric choices. As you've seen, I really wanted to use polka dots, the challenge fabric just begged for polka dots! But I was seriously dubious about my original selections, and had pretty much given up on the idea. I had a brief retail therapy opportunity before speaking for the Gathering in Fort Wayne, IN on National Quilt Day, where I found this perfect palette of dots.


All tone on tone, multiple values, perfect compliments to the crazy challenge fabric. (Yes, those are fingerless gloves on my desk, it can get pretty nippy in the studio.) Once I had just the right fabrics, I just dove into creating the templates for the applique shapes.


It's been a while since I've worked on a project with repeating motifs, but by marking each piece (I call it my addressing system), I'll know where each shape belongs. As the flowers were cut apart, each shape was stacked up on the appropriate fabric and then pressed in place. Another big bite of the project is done.

Wednesday, March 5, 2014

Now with EVEN MORE SNOW!

Honestly. I've tried very hard not to complain about the weather. It's been weird and whacky all over the place. We're having winter with a capital "W". We haven't seen the ground since weeks before Christmas. This is unusual for us. The bitter cold has made it nearly impossible to work in my window filled studio. The poor little fireplace/furnace as struggled to bring the temperature above fifty degrees. It's hard to do stuff with numb fingers.

But it's March now, and the sun will have her way with us. I can feel the longer daylight in my bones. We're having more sunny days. It's supposed to go above freezing later this week, and, yesterday I saw three blue birds at the feeders.


Pow! I'll bet all that color got your attention! The print fabric is the closest I could find to the challenge fabric in EQ. I could have scanned the actual fabric to make a more accurate showing, but this is just a working diagram so it's not really worth the time.

After settling on a design, I decided it was too busy to use all my polka dot fabrics, instead, I plan on using tone on tone batiks.

I guess, since I haven't just plowed ahead, I'm having second thoughts about the amount of applique. Is it even possible to have too much? I'm thinking about eliminating the smaller motifs, but then the quilt looks empty. Is it back to the drawing board for me?

Saturday, August 3, 2013

On the Newsstands Now


This is the super secret project I mentioned earlier this summer. It is a new favorite quilt for me. It's in the current issue of Quiltmaker, on newsstands now. (I just saw it in the grocery store, and got a nice giggle when I saw my name on the cover. Bazinga!)

It signals the beginning of a new approach to my applique process. The working title for the article was "Hand Applique by Machine, By the Numbers", sort of a take on the old paint by numbers kits we used to buy as kids. (I don't remember what the end title was in the magazine, probably something close.) If you'll excuse the pun, it's a way to be a little more painterly in my fabric choices.

I've modified the addressing system that has kept my sanity all these years from being just a way to keep track of all the pieces to focusing more on light and shadow and fabric choices. I've gone from mass producing perfectly matching motifs by the hundreds to cutting shapes out one at a time to give each a little special character.


I've used sort of the same idea with my Of a Summer's Day project (which hasn't changed a bit from this earlier picture, maybe next week.) I've tried to use light and dark to give the roses a little more dimension. I started working out the new labeling system on this project.


Here's a close up to show the quilting. I think the overlapping circles on that upper fabric reminds me a bit of the movement in some Van Gogh paintings. The lower fabric is quilted in vertical straight lines, a nice contrast to the circles and curves above.


Hand embroidery was added for a little more definition, and to add details too small to applique. (Okay, I have to admit that I could applique the stems, I just didn't want to.)

Even in my large quilts I've always been mindful of value placement. It can make a quilt sparkle. What do you think, would you like to have your applique patterns tell you where to place the lights, mediums and darks for a certain look? Is that even something that matters to you in your projects?

Wednesday, June 19, 2013

Yellow or no yellow, that is the question

Moving forward again on the On a Summer's Day project, finally! Almost everything is pinned to the background. I seem to be a larkspur short of a quilt (no surprise there). I'm hoping it will magically appear while I'm making other choices. After looking for several days for the leaves, I found them exactly where I had put them: in my project bag for my last teaching trip of the year.


All the dots are the heads of the flat flowerhead pins. Those babies are sharp. There was a whole lot of ouching going on as I pinned more and more pieces. I'm just glad that I didn't bleed on the thing.

Clearly I still need to add in the stems, but I have to decide which will be fabric bias stems and which will be embroidered in.The butterflies have been left off as well. I had planned for one in the upper left and the middle right. The missing larkspur should be right at the top. I'm not at all sure that it needs to be replaced.


Now the little yellow flowers have been added in. I fancy them to be little coreopsis zagreb, named for a small town in Croatia, where my grandparents are from. Along with them, feathery ferny leaves would be embroidered. I moved the top larkspur over just a smidge, and now I don't think the a.w.o.l. flower is missed at all.

Yellow or no yellow, what do you think? I'm tending towards the yellow, and I think it also needs a few more. Just a couple up top, and maybe in the lower left. Yes? No?


Wednesday, February 27, 2013

Four Backgrounds

While I still have some embellishing to do, it's time to settle down into choosing a background. Usually I just know what I want to do, and just go ahead and do it. This time, not so much.


This is the pieced background. It's more blue than the photo, but the darker accent fabric does have a grey undertone. I'm just not feeling it. It seems as though the background can't stand up to the vibrant colors of the applique. What do you think?


This is choice number two. I love the print, but I think the fabric is just a little too purple.I fear that the purple larkspurs would be completely lost. So the question becomes, do I keep the background and make the larkspurs over in blues?

What do you think of this one? I only did a close up because the flash was washing it out. (Yet another dark and grey day here, with six inches of fresh snow over night.)

While I like the silveryness of it, it also feels a little underwhelming compared to the appliques. So, do I want a quiet place for the applique to shine, a background that truly fades into the background? This fabric would give the whole piece a bit of understated elegance.


And then there's this background.


Wowsers! I am really, really liking this. I like the linear, yet curvy print. It reminds me of a tin ceiling, only on drugs. The flash has washed out the color a bit around the applique, and I like that effect. I'm going to see if I can mimic that with pastels or water color pencils.


I can imagine following the print on the fabric for machine quilting, it would give it a tufted appearance, especially if I put a small something in the centers of the tiniest squares, like a bead, maybe?

Can you help me choose? Really, I'd love your opinion. Shall I go for a quiet or bold background? Beaded background, really?


Thursday, January 31, 2013

Of a Summer's Day


So, here it is. (Sorry for the lousy picture). All of the planned parts are glue basted. So far I'm pretty happy with how it's turning out. I used only batiks, and all from my stash. I think I really do need to add a little something more, it's not quite as sumptuous as I wanted. But I think whatever I add needs to be airy, light as a feather. I'll be playing with that today, along with the butterflies.

 
The basket design took a bit of thought. I didn't want it to steal the scene, so my first plan was to use just a single fabric and either embroider or quilt in the details.


When I got to this point I was really tempted to go with the embroidery. I kind of liked the rustic lines. I decided to go on with the plan to use bias strips and actually weave the basket, figuring if I didn't like it I could always start over. (Ahh, the joy of no deadline!)
 

Now I'm wondering if I made the under piece too dark, especially if I put it on a light background. That would be a pain to change, so I'm shouldering on for now. After finishing the butterflies, and deciding on the little accent flowers, it's off to the sewing machine. I'll start by stitching together the individual motifs, and then stitch together as much of them as I can, which will make it much easier to decide on that background.

Tuesday, January 29, 2013

Back to work


It didn't take long to trim away the extra fabrics, creating a seam allowance. The next step is glue basting and docking. I was about to leave on a trip, so I bagged up all the parts, my key pages, glue sticks and "magic wands". This well organized zip top of fun followed me to Denver, where I did something awesome, something which required lots of changes of clothing, and a special manicure, and,  aboutwhich I'm still not allowed to tell you (although others have, but you know, I follow all the rules).

My plan was to have all the parts glue basted and docked by the time I returned home.
But, by the end of each day I had used up all my brain cells and just didn't trust myself to touch them. Plus the bag was all the way over on the desk, and I was sitting in the chair in front of the television, and I couldn't make myself get up and walk the ten feet round trip to get to the desk.

 
Now that I've been home for a bit, and rested up, I've gotten myself back to work. Some of the pieces I'm appliqueing are pretty small. This little sweetie is smaller than the nail on my little pinkie. Since I wanted this project to challenge my skills, working small was part of the plan. I've decided to work on the smallest pieces first, saving the easier stuff for when my resolve is failing.


Here's what I've accomplished so far. The most observant will notice that one of the larkspurs at the top is leaning in the opposite direction from the diagram. I haven't decided if I need to change it. I'm also still considering a change in the large flowers, to a rose that looks more like a tea rose than an old fashioned wild rose. And I'm still thinking about adding tiny yellow flowers, but the design that fits best is a five petal flower less than an inch tall. Yowsers!
 
In the meantime, I've started another pile of fabric for a new project. It will be a large, scrappy, quilt, one with many steps, to be revealled over several months...