Tuesday, November 3, 2015

What I did on my October vacation


October is a weird month for me. I love everything about autumn. It's been lovely to learn what colors the trees around us will become. On my street, autumn is golden. It's been amusing to see how neighbors deal with falling leaves. I'm not saying it's competitive lawn care, but I will say that I have a few meticulous neighbors. It's been a learning curve for we country bumpkins.

On the first Saturday, we met our son and his family in Milwaukee for a day at the zoo.He was in town to run a marathon. We had a delightful day with our grandchildren, right up to the point when my granddaughter sneezed right in my face. Well, it was still delightful afterward, but I knew what was coming. Sure enough, ten days later I'm out for the count. Children are adorable little germ bombs.

I was invited to offer a little demo of my applique technique during the day meeting of the Evergreen Quilt Guild here in Green Bay. These demos are supposed to be informal little snippets of tips and technique, offered up by members of the guild. Well, of course I went over the top. It's what I do. I made little kits and patterns for everyone. These things are tiny, and heaven knows I have the stash. But I love it when I can be the pied piper for applique. I'm pretty sure they now know that I'm a bit obsessive, but you know, if I'm going to do something, especially any kind of teaching, I just have to do my best.

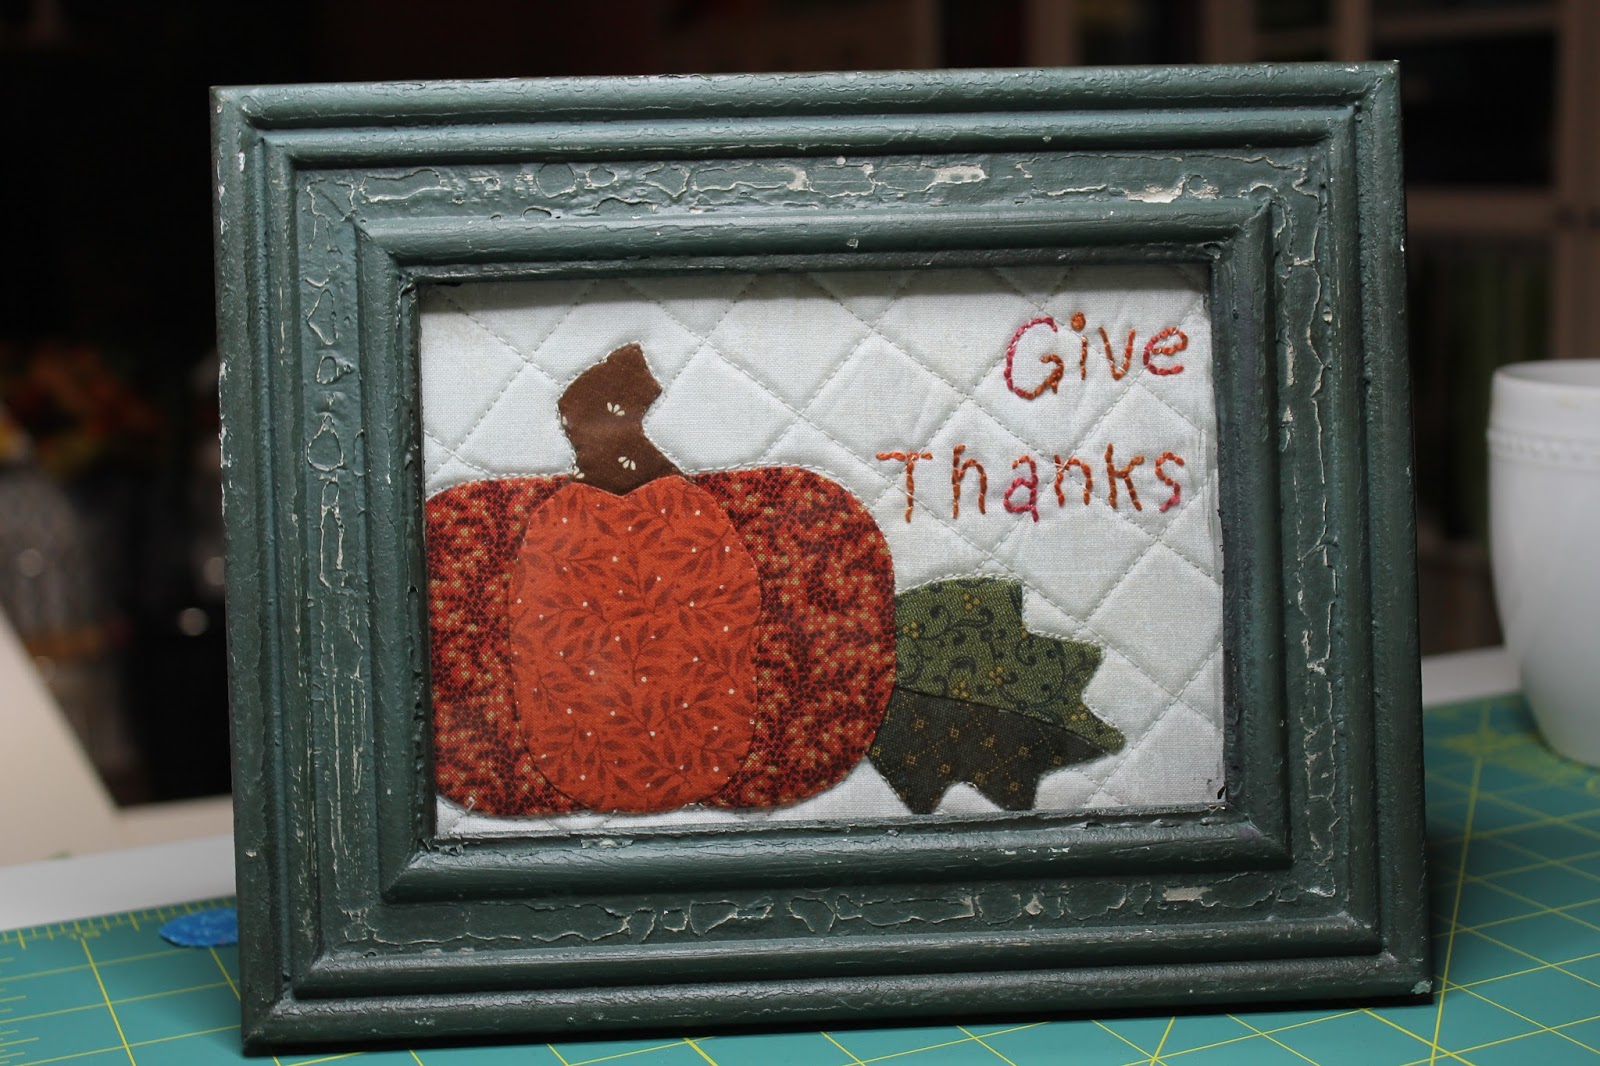
This. This is freedom. I agonized, agonized, for a week about what to do with the leftover parts. I had bits and pieces of pumpkins and leaves and templates printed on Wash Away Applique Sheets just nagging at me. Perhaps a table runner, but no, I'd want to make the pumpkins larger. Maybe just a little candle mat, no, I'd want to add so much more to it. What I want is to be done with it. So there. The leftovers served their purpose, their job is done, time to go into retirement. Permanently. (Oh, wait. I don't think I've emptied the can yet. There is still time...) In case you want one of your own I've uploaded the pattern (free) to my Craftsy pattern store. LINK

So here's where October gets weird for me. I loathe Halloween. I pretty much hate everything about it. (Am I the only one?) It's become so gory, it seems to celebrate the evil and ugliness around us. I know, it's a thing, but I find myself hunkering down, closing in during the last week or so of October.

I will admit that I got a big kick out of handing out candy this year, something we haven't done in twenty years. The little ones are the best. Still, I'm relieved that November is here and we can celebrate our better natures in Thanksgiving and Christmas.


Wednesday, September 30, 2015

Danger Zone


 This project is in real trouble. After months and months of work, this quilt is on the verge of becoming a WIP (a Work In Progress, otherwise known as a project laying about that isn't actually being worked on) or, more ominously, a UFO (UnFinished Project).

Half of the center applique is done. The rest is mostly pinned on and will be stitched in place today. All of the parts are sorted and just waiting for their curtain call. But I'm losing steam. I'm losing interest in finishing.

It might be the distractions. I have several projects waiting in the wings, projects that I am itching to get to. The beguiling thing is that the projects are sneaking into brand new processes and I am always enticed by the opportunity to learn something new.

I have this stack of software waiting to be loaded onto my computer. It's embroidery software for my Bernina 880, including the cut work tools. The 880 has a stitch designer function, allowing me to create my own decorative stitches. I want to design new applique edge stitches, I can already see them in my head. I'm anxious to get started, but I have this big project I need to finish first.


And then there's this pile of stuff. Have you seen the quilting they're doing with rulers and domestic sewing machines? Check this out. How did I not know about this? Of course I had to run out and get a sampling of tools and equipment. There just might be an easier way to finish quilting Christmas Yet to Come! Of course I'll need to practice, and for that I'll need practice projects. Oh, but I have this big project I need to finish first.


Of course, none of that even takes into account of all of the other distractions around here. I have this terrific new electric spinning wheel to master. And while it is the coolest thing since forever, I still love spinning on the traditional wheel, so it needs some loving attention.

As for the loom, well, I'm just not sure about that. If it's going to take up prime real estate in the living room it certainly needs to be warped and worked on. It may be looking for a new home shortly. Not sure that the weaving bug has really stuck with me. But for now, I really have to concentrate on this big project.

I worry that if I put A Fine Romance aside it will never be finished, look what's become of Christmas Yet to Come. It is still waiting to be quilted. Or worse, it will lurk in the background, making me feel guilty for not wanting it any more. Oh, wait, it's currently staring me in the face and making me feel guilty for not wanting it any more.

I'm not sure when I gave up multi-tasking projects to become a serial processor. Well, that's not completely true. I think of myself as monogamous within crafts, it's okay to work on more than one project as long as I'm cheating on quilting with knitting, or spinning or weaving. (Lucky for me that gardening, baking, and decorating are chores, not hobbies or I'd really be toast.)

Indecision might turn out to be my best friend. I am making good progress even while I think about setting it aside. What do you do? How do you stay faithful to large projects, or is that just silly? Am I the only quilter in the universe who works on one quilt at a time?

Monday, September 28, 2015

Just a couple of knots


So much has happened since I started this project that I couldn't remember if I had a plan for the center of the flowers. Well, that's not true. I know I had a plan. I always have a plan. Not remembering the plan meant that I needed to come up with one pretty quick.

I was fairly certain that wool was involved, so I started by cutting circles out of different colors of wool. I had to remind myself that testing isn't wasting, that it would be so much better to toss a couple of circles of fabric than regret dozens and hours of work too.


In the end I settled on yellow. I haven't used much yellow in the quilt so far, and it adds a nice sparkle. I tried different sizes, considered cutting star shapes instead of circles. But, in the end, the yellow circle ruled the day.

(I can't believe how much the glue shows in these pictures. I sure was sloppy with it. No worries, though, it will all be gone in the first wash.)


In the end it was really all about the french knots. They make me ridiculously happy. Using #5 perle cotton makes them look like fat and happy seed beads. Some how the plan (see, I did have a plan) changed from a simple circle of knots to a center full of knots.

All that is left for me to do is to make the bias strips and get to stitching all the parts and pieces to the backgrounds. Doesn't seem like much, does it, after coming so far?


Wednesday, September 23, 2015

There, now here

We have all this stuff. Too much stuff, depending on who you ask, but I'm not asking today. The trick is making it fit. Not fit, like finding a place for everything, but finding what's right for this house. I'm having trouble using what we brought with us to decorate where we are now.

To be honest, it was all starting to feel a bit stale. A couple of years ago I realized that I hadn't redecorated in a very long time. It was as if I had finally found just the right thing for each space and then left it there. I was happy with it, and then, suddenly, I wasn't. Now I've brought it all here. I'm torn between comforting familiarity and the idea of trying to make this house into the one we left. (I tried to convince Kent that we should just sell all of it and use the moving stipend to start fresh, but he wasn't persuaded.)

This is the kitchen chandelier that came with the house. Meh.

This is the chandelier that we brought with us. It was perfect in the old kitchen. It has a sweet story. My mom found it at a yard sale for a song. Knowing how much I love blue willow, she thought it would be perfect for me and had it in the trunk of her car when we found the Saginaw house. Hanging it was one of the first changes we made when the old house became ours.

I can't decide. Wall color aside (it will be gone as soon as the weather shifts us from garden to indoor work), does it fit? Can I decorate the kitchen around it? (You have no idea how badly I'd love to paint the cabinets white. If they were real wood it would have already been done.) Does it stay, or does it go?

Sunday, September 20, 2015

Small victories

It was truly of moment of truth when the sashing strips were sewn together for the quilt borders. These strips were challenging little buggers, with all the angles and matching points. It didn't help things at all that they were constructed in the hotel room, with a jerry-rigged cutting table, mini ironing board and dodgy hotel iron.


There certainly is a lot of "character" in the edges, that's for sure. Truthfully, I spent more time dreading the easing it was sure to require than it actually took to sew everything in place.

Look at it! They match up to the border perfectly. Perfectly. Not a bit of stretch needed! You know this doesn't happen often, so when it does, you'll have to forgive me my little bit of crowing, please.

I'm proud of the quilts I make, but they are far from perfect. There are a lot of secrets tucked between the quilt top and the batting.

But then we're like that too, aren't we. We like to present our best face and keep our failures tucked away. I think we're the most interesting when the facade falls away and we're our truest selves. Feel free to look for the flaws. I think they are the best feature. But, for once, for this part of the quilt, no easing required!

Thursday, September 17, 2015

A garden where none was before


It is fair to say that the folks who owned this house before us were not into gardening. They said so themselves. Most of what lives in the ground here has been in place for almost thirty years. Like the evergreen bushes that left the front yard earlier this summer, and the ones blocking most of the sunlight into the studio.

My original plan was to turn this area into a dry river bed, shade garden. It was dark, gloomy and uninviting. But when those nasty bushes (does anybody really like them?) were removed my whole plan changed.

Suddenly we had sunlight! When I say "we" worked in the garden mostly I mean Kent does the hardest, sweatiest parts and I zoom in at the end and make the pretty part happen. I'm also usually the one who thinks up the plan. Luckily, Kent is willing to play along. The walkway stones are leaning on the retaining wall while the sod goes in.


The angel, who has followed us from Wisconsin to Michigan and back to Wisconsin again has finally found just the right spot. Since this corner remains pretty shady, I've planted ferns around her. The birdbath end of the path gets marvelous afternoon light, so it's planted with sunny to partly shady plants that will bloom in the spring. I couldn't resist adding in a couple of mums for fall color. (I just may sneak a few pansies in there before the end of the planting season.)

With the bushes gone I can see the entire garden from my desk. The bench is a wonderful place to be quiet and thoughtful. I think this will be the last big change we'll make to the yard this year, honestly there's not a whole lot left to do. Next spring Kent would like to turn that screen tent into a true gazebo. Slowly we are making this place into our place. It's hard to feel fully invested here, with the ties remaining to the house in Saginaw, but we're coming along. It may take a while to feel truly at home, but we do like it here.

Tuesday, September 15, 2015

And then there were eight

Step Eight is up. That's it. That's all, she wrote. Ta-da! All of the steps for A Fine Romance have been posted. Actually sewn? Well, that's a bit of a different story, now isn't it?

Considering all that's happened in the last eight or so months, I'm actually pretty pleased with how much I've accomplished. All of the blocks are pieced, just waiting to be joined together with the last of the sashing strips, and that won't take long. The borders are pieced too.

I'm glad that I saved some of the simpler blocks for the end of the project. Usually I like to advance the skills required as the project continues, it's the teacher in me.

This time around I decided that this quilt would really be all about the applique, any teaching moments would be a lucky bonus. This month's step includes the math to make any size square-in-a-square block, so I did manage to squeeze a little extra information in there.


While it feels like the quilt is nearly done, I still have a bit of work ahead of me on the applique. All of the bits are glue basted, just waiting to be stitched together. I feel some embellishing coming on, but I just haven't decided how involved I want it to be. French knots are on the list for sure, beading remains to be seen. For some reason I think I might want to add a bit of black to the center of the open faced flowers. Talk me out of it?

I've got my nest set up. The machine cabinet is finally repaired (it was broken in the move) so I can comfortably sew. A brand new "In Death" from J.D. Robb just came out. I wonder what I'll finish first, the audio book, or the stitching on the applique? Oh, well, I always have Craftsy on the computer to help pass the time.

Wednesday, September 9, 2015

Cutting Big


Here is my layout for cutting the strips for the border background for A Fine Romance. The bulk of the fabric is supported by the chair. (What can I say, I liked it so much I bought the entire bolt.) Years ago I invested in a couple of extra large rulers, 16 1/2" and 20 1/2" squares. I don't use these very often, but they make quick work of the job when I do. Using them meant I could cut up the needed pieces for the border easily.

I know lots of quilters are limited in space and budget. I started out as one, I've been building my toolbox for more than thirty years. But I feel compelled to, once again, caution against using the markings on the cutting mat for measuring.


This is a brand new mat. I put my ruler down on the mat with the measurement lines aligned.


This is what I see at the other end of the ruler. In the space of just eighteen inches, the lines are clearly off. But here's the thing. We are cutting huge hunks of fabric for the borders for A Fine Romance. And while these lines are off, in the whole grand scheme of things, this smidgen is not going to amount to a hill of beans. Just be wary of using the mat for anything that might need to be precise.


I don't know why this picture rotated, but here it is. To get my 13 1/2" x 40 1/2" rectangles, I refolded each strip so that I could cut with the least amount of waste at one end. Doing this has the added benefit of placing the fold off center of the piece. Sometimes those folds are hard to remove, so moving them off the center focal point can help to disguise them.


To measure using the mat, instead of trying to align the ruler at the 20 1/4" mark (which will give us a 40 1/2" rectangle), I like to use the ruler to add the 1/4 inch. The one inch marking lines on the mat are easier to see than those little intermediate hash marks.


Now that autumn has arrived I'll be spending less time and energy getting our new gardens up to speed, and more time in the studio. I have just a few circles left to glue baste and I'll be moving on to stitching the flowers together. We are only a few days away from the last step of this block of the month project. How is yours coming along?


Tuesday, September 1, 2015

Step Seven, with a side of emo


For the more tenacious folks following this block of the month, you've already discovered that Step Seven has been posted for a couple of weeks. For those of you waiting to hear from me, here you go. (And so sorry once again, for the delay in the notice.)

Now for the side of emo. The stress and worries of the job change and big move have caught up with us at last. We've been under the gun, unsure of our fates since the beginning of January. I think that now that we're feeling more settled into our Green Bay life we've relaxed enough to feel all of the pressures of this huge change in our lives. Let's just say that the word "snippy" has been forthwith banned from all use in the household.

The Saginaw house is still for sale. We've finally dropped the price to what I thought we should have started with the first place. And we buried a St. Joseph, which felt a little sacrilegious to me. Once I saw the little statue all boxed up in a special "this is the guy to bury" package I felt a little less squeamish. He's been in the ground all summer. So much for the quick results. On the other hand, while working in the front garden here we found the St. Joe that the former owners of this house buried. He's now on the kitchen windowsill where I can remind him on a daily basis that he's got a job to do.

The wonderful old Saginaw house truly was the house of my dreams. It was a landmark, it had a life of its own which it graciously shared with us for twenty years. I loved saying, "I live in a house built in 1860." Or, "We live in that old farmhouse next to the park", and have everyone know exactly which house that was. (I think half the county walked through it during the estate sale two weeks before we bought it.)

In moving here we were no longer interested in "the house of our dreams". We had that. We have just want we wanted, enough space for our toys, enough dirt to garden, all on a quiet street. It didn't start out as something special, but, as Kent reminds me, it will be by the time we're done with it.


Tuesday, August 4, 2015

Same but not same, the leaves part two


When I first learned to applique, more than twenty years ago, uniformity and perfection were the hallmarks of excellence. In many applique circles, especially those grounded in the traditional style, these values continue today. Even as I was developing my own applique technique, my initial goal was to create a process that would allow me to quickly and efficiently make precise and uniform templates for my applique motifs. Stapling and cutting multiple layers of template material gave me that outcome, and I appliqued on happily for many years.

But lately, I find my desires are changing. Leaves are never uniform in nature. They twist, they change colors as they mature and they're all different sizes.

One of the nicest things about my applique technique is that I can make changes on the fly. Early on I decided that I'd cut out each leaf individually, all eleventy-million of them, a far cry from the quick and efficient method I worked so hard to perfect.

One of the most frequently asked questions in my classes is where to cut: inside the line, out side the line or exactly on the line. I always reply with "somewhere near the line". Since I cut each element from a complete motif (as opposed to exploding the design and cutting each element individually) it doesn't really matter how the cut is made. The shapes will fit together again, guaranteed!


For example, here's a basic leaf template. It looks like I more or less followed the line for the outer edge. Also notice that each half of the leaf has a letter name and a penciled in number. I call these notations the "address", so I'll always know which halves belong together.


When it came time to cut the halves apart I totally ignored the line. My only concern at this point is that the two halves end up on a different fabric.


After all of the leaf parts are trimmed for the seam allowance, they are sorted by letter and shape. You can see that I missed the line on quite a few of the leaves. From here, the pairs are matched up and it's time to start glue basting.


This is my lap sized light pad (about 11" x 14"). I've covered it with a bit of template plastic so I'm not getting glue directly on the surface of the pad. I need my scissors to clip a few concave seam allowances. You can see on the leaf about to be basted that the cut was so wild that I had to transfer the address to the skinny half, no biggie. The cuticle stick is what I use to control and adjust the seam allowances until they are smooth and perfect. No fancy, expensive tools needed here. I use a simple white glue stick, which is on the table next to my beverage of choice. I have my feet up on the foot stool, I'm onto season three of Foyle's War on Netflix now, and I still have about a third of the leaves to go.


Tuesday, July 28, 2015

Tackling the leaves, part one


Let me just say this now: this quilt has a lot of leaves. I started work on the leaves about a week ago. I am still working on the leaves. It's been hot and muggy here, so hiding in the air conditioning has given me tons of time to cut, press, cut and sort.

While I've been working I've been mostly parked in front of the TV. I've found Miss Fisher's Murder Mysteries on Netflix. It is such a charming show, sort of like Murder She Wrote, but with an Australian accent and set in the roaring '20s. The clothes are to die for.

Managing all of these leaves could be a nightmare, but my trusty "addressing system" saves me again. Each half of the leaves has a distinct letter name, and each leaf has been assigned a number. When the time comes I'll just need to match up letter and number to get a complete leaf.

I've been working on the stack of leaves a bit at a time. As I cut the leaves into sections each piece goes into a separate pile. I like to work with three shades of fabric at a time. The only thing I have to worry about is making sure that each half of a leaf ends up in a different pile, which will end up on a different fabric. It would be silly to do all of this work and end up with both halves in the same fabric!


The trimmed halves have been sorted into stacks by letter. When I'm ready to get serious about the glue basting I will then sort the stacks into matching pairs. I'll blog more about that soon. I have a bit of trimming to do yet, time for more of Miss Phryne Fisher's adventure.

Tuesday, July 21, 2015

On the street where I live


This song has been running in my head for a while now, the smarmy one from My Fair Lady. It started one Sunday morning when I went out for the newspaper. It was cool and just a little bit misty, the morning sunlight dappling the street. At that moment I realized that this is exactly where I'm supposed to be right now, and I was content.

We had such a list of desires for our Green Bay home, and a ridiculously small budget for it. I think we were suffering from HGTV poisoning, at least I was. I mean, where are the Property Brothers when you need them?

In the end it was a compromise: two and a half stall garage instead of three and a family room turned into a studio. The lot is tiny, especially when compared to the Saginaw house, and the back third of it goes straight up.

But here we are, and it's beginning to feel like home.

It nearly broke my heart to watch as the garden centers around town blossomed with plants for the new season while I was stuck in a tiny two room hotel apartment with no dirt to call my own. Even after we were in the new place there was just so much to do before we could even consider playing in dirt. I cringed every time I passed this monolithic shrub at the front door. I mean really, could one say "stay out" any more plainly?


We (meaning mostly Kent) tackled it Independence Day weekend. In the end it turned out to be just two plants. It took a chain saw, a pick ax and a whole lot of sweaty digging to clear them out. The county's garden waste center is nearby so off went the bushes (which all fit into the back of my minivan) and we returned with rich black compost.


The swan bird bath looks a little overpowering now, but it might even disappear once the plants get to growing. I followed no rules except for "taller to the back". The flowers were chosen in hopes of attracting butterflies and humming birds, oh, and for cutting as well.


This fall I will tuck in a few mums and bulbs for spring flowering, I think I left enough room for that, maybe. There are yarrow, shasta and gloriousa daisies, purple coneflower and balloon flowers in pink and blue, along with anise hissop, blackeyed susans and russian sage. (And a blue frisbee for Gracie, but that moves around the yard.)


There now, doesn't that look so much more inviting? The big shrubs under the windows? Well, their days are numbered too.

Friday, July 17, 2015

Step Six-Applique progress, at last!


Step Six is up! Can you believe that we're three-quarters of the way through the project? If you've been keeping up then you're really ready to put this thing together. Of course, I'm way behind on the applique. I've been keeping up with the piecing because I feel I must test drive the instructions. As for the applique, well for me that requires a bit of a still mind and I've had anything but.


This is where my applique progress stands. My purple and orange flowers are all done. My big red roses are done (I did those early on to check on yardage requirements.) I've yet to start on my pink flowers, and the leaves, oh the leaves I have yet to do.


I spent a quiet afternoon yesterday watching Miss Fisher's Murder Mysteries on Netflix and cutting out all of the leaf templates I had printed. I also broke out my handy dandy circle punches to start on the required circle templates for the quilt. I'm so frugal, all of my circles will be cut from scraps left along the edges of the pages of Wash Away Applique Sheets.

I'm using Marvy circle punches. I find these little lever deals work best for me on the WAAS. I've tried Fiskars brand, and they may work wonderfully on freezer paper, but they're a dud on the sheets.


I probably should have lead with this, but here is how the center design template looks all taped together. I'm missing that great big cutting table I had in Saginaw, but when I'm ready to lay out the design I will make an appointment with the local shop to borrow their big tables. That's a while off for me though, I still have all of those parts yet to make, and they have to be sewn together, and embellished, and and and...

And the bias stems, yikes! Using a tape measure I figured out that we're going to need about seven yards of bias for the vines. That was the easy part. Trying to figure out how much fabric we'll need to make those bias strips, and also guesstimating how much we'll need for the borders too was a bit of a challenge.

Until I found this. I'm still dithering on all one fabric or many, but just in case I have a two yard cut set aside for now. And, I have a bit of applique to do before I must decide. How's it coming? Are you all set to lay out the applique center?


Wednesday, July 15, 2015

She Sews


This is where my BOM has been languishing, tidily packed in an ArtBin, waiting for me to get my act, I mean studio, together. We're almost there, but we're still waiting for the replacement part for my cabinet. Kent finally assured me that the machine would be safe in the cabinet, but, you know, I wanted to wait for the part to arrive so that everything would be perfect. "Perfect" still gets to me.


Here are my Step Five parts. Even though the step was posted weeks ago, my blocks were just sewn yesterday. I'm almost caught up. I still have the million and five leaves to do, but my little buds and flowers are mostly done. I'm putting the finishing touches on the directions for Step Six. I just need to add a few words, and figure out how much yardage we will need for the vines. I will have it up in the next couple of days for sure, and I will post on the blog about it.

As for the vines, I can't quite decide what fabric to use. I'm wondering if I should make the vines all from the same fabric, or mix them up using bits and parts from the leaf fabrics. I'm tending towards all the same fabric. What do you think?